I am pretty adventurous when it comes to home improvement projects. I am not afraid to try something new. Not afraid to rip out a leaking reverse osmosis system under the sink or paint a color that others might shy away from. I figure if I screw it up I'll fix it or I'll call someone else and pay them to fix it . But I won't know if I can do it until I try. And I drag my poor husband along on my quest for improvement. Good thing he loves me and he's a good sport. We also have a couple of very handy friends that help when needed.
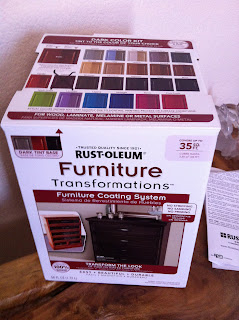
We were in one of those home improvement stores, getting ideas for the kitchen. Nothing major, just something to refresh the space a little. I have some ideas of what we could do. Some are really out there (I want to brick one of the walls) and some are easy (I want a backsplash). One thing that I hate is the cabinets but other than painting them (which I'm not sure that I want to do because I love the woodgrain) there's very little that can be affordably done. I've resigned myself to this. So we were wandering around when this caught my eye:
First thought - Too good to be true. No sanding? Right. That'll never work. Second thought - I wish there was a smaller size so that we could try it out on something else first before we committed to doing the kitchen. What if it's awful? So I sought out Mr. Home Improvement Associate and started asking questions about it. Look what he came up with. It's a mini Rustoleum for people like me. And the best part - it was $35. I can afford that. And he assured me no sanding necessary. I still didn't believe that.
He suggested that we try it out on similar cabinets in the house. I instantly thought of the kid's bathroom. It's been redone (thanks honey) and the cabinets in there are the same blah as in the kitchen. I chose the color cabernet - which is what I would like in the kitchen. If the experiment failed, I'd just paint them white, which would go with the colors in there. They tint the base coat at the store and then you're committed. So it was game on.
The first step is to wash the cabinets and let them dry. Then you use a deglosser instead of sanding. This is the part that I doubted would work. But if we do the kitchen in the future I really don't want to have to sand them so I was praying it would work. The next step is to do the first of the two base coats. NERVOUS. The response when the first coat was done was that it was really red looking. We were both worried. But we had begun this mission - and we would see it through.
After the second coat, we got to the optional decorative glaze. My hubby had been online watching the tutorials on rustoleumtransformations.com and he assured me that the glaze was going to make them even better. I was really excited about the glaze. After the glaze dried it was just the protective top coat and we were done. And I still have woodgrain. SO EXCITING.
Can you believe that? IT WORKED. I could not be happier. Or more surprised. And no sanding. So today we'll put the cabinets back together and we'll head back to the home improvement store for more ideas and all the stuff we need to do the kitchen cabinets. And the next adventure will begin... stay posted.


No comments:
Post a Comment